


To some, wood paneling is synonymous with orange shag carpet and avocado-colored appliances of the 1950s through 1970s. But paneling is making a comeback for many reasons. Paneling is a way to bring the beauty of the outdoors inside. A rustic look can be achieved with reclaimed – or reclaimed looking – paneling. Wainscoting has become a popular decorating choice as well as running panels horizontally to give a room character. Many times, paneling is white-washed or painted a neutral color such as gray. Wood paneling is more durable than drywall or wallpaper and can even protect your walls.
Tag: Basement waterproofing
How to Improve Indoor Air Quality for Your Home
By: | Published February 27, 2019
You look for quality in life: quality time, quality sleep, quality food, but what about quality air? Have you thought about the indoor air quality in your home and how it can affect you and your loved ones? When the quality of air in your home is poor, you can experience health problems. How can you get quality in life and improve your quality of life? One simple step is improving your indoor air quality.
Health Risks of Mold Exposure & How to Keep Your Home Mold Free
By: | Published January 24, 2019
There are thousands of species of the fungi commonly known as mold. Mold exposure, especially for those with asthma or mold sensitivities, poses a serious risk to your home and family. Everything from yourself, to your pets to even your belongings can be harmed due to mold exposure. So what exactly are the health risks of mold exposure? Let’s look at the impact of mold and how to keep your home mold free.
What Is Weeping Tile? Is It Important for My Home?
By: | Published January 10, 2019
How your property handles water drainage is one thing you can’t overlook. If you’ve had concerns about waterproofing your home, you may have heard about an option called weeping tile. What is weeping tile? It’s an effective system for capturing and moving water away from your home that goes back centuries!
Interior vs Exterior Waterproofing
By: | Published December 3, 2018
Whether it’s a damp, musty smell that meets you each time you enter your basement or the pooling water in your back yard whenever it rains, you are considering basement waterproofing for a reason. What are the different waterproofing options and which is better when it comes to interior vs exterior waterproofing? Read on to learn more about these two options of waterproofing and which one, or a combination of the two, is right for your home.
What is a Michigan Basement & How Do You Protect it from Water?
By: | Published April 25, 2018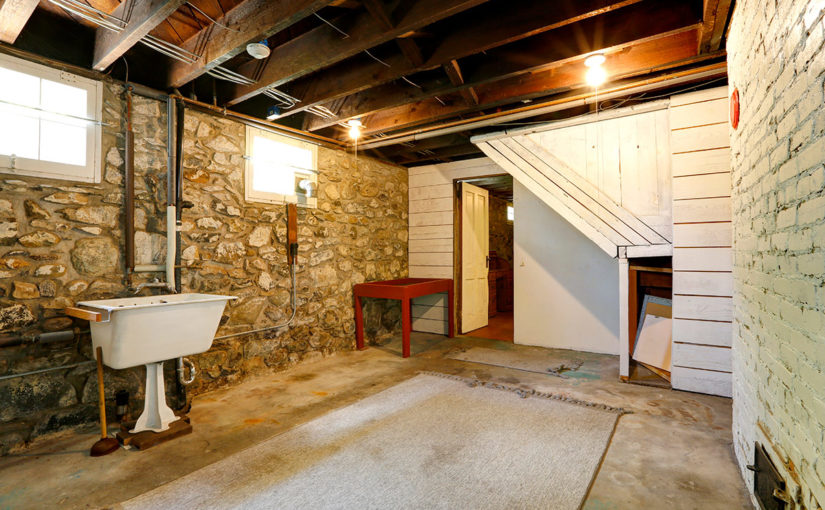
Whether you live in Michigan, Ohio, or another area, you may have heard the term “Michigan basement.” In this article we’ll explore what that term means and offer tips on how to protect your Michigan basement from water damage!
Waterproofing Window Wells to Protect Your Basement
By: | Published March 20, 2018
Keeping water out of your house is a priority for every homeowner. Unlike foundation cracks or other damage, most homeowners aren’t surprised to learn their basement windows are a major risk factor for water intrusion. Waterproofing window wells and the windows inside of them is an important step toward keeping your basement safe from the weather.
Warming Weather Could Put You At Risk for Snowmelt Flooding!
By: | Published January 25, 2018
Weather can be unpredictable. One moment it’s snowing, the next it feels like spring. While many long for warmer temperatures throughout the bulk of winter, it’s important to appreciate the risk that rapid rises in temperature can cause to your home. Your joy of the warm, sunny day may evaporate the moment you notice the snowmelt flooding your basement.
Should I Seal the Gap Between My Basement Floor and Wall?
By: | Published January 4, 2018
Every homeowner is concerned with keeping their house protected from moisture and water damage. One area that is vulnerable to seepage is your home’s cove joint. Unfortunately, you can’t just seal the gap between your basement floor and wall to fix it. Learn why not, and the best options for keeping water out of the cove joint by reading below.
What Is a Cove Joint?
This joint, where your basement wall and floor meet, is known as a cove joint. It exists due to the way that a home’s foundation is poured. After your foundation footings are built, your basement walls are poured so that they slot into a keyway. This helps keep them properly aligned.
When your walls have cured, the basement floor itself is then poured. This leaves a small gap between the floor and the walls – known as the cove joint.
Why Does the Cove Joint Leak?
Following a heavy rain, ground water around your home will rise. It begins to push into any potential openings in your foundation. Because the cove joint is a necessary part of structuring your foundation, it’s a common entry point for water. As prolonged rains or heavy rains continue, they’ll begin to force their way in through these gaps. This is typically referred to as hydrostatic pressure.
Why You Can’t Just Seal the Gap Between Your Basement Floor and Wall
It may seem like an obvious solution to simply seal the cove joint to prevent water from breaching into your home. However, it’s not that simple. In the short term, a sealant applied along this gap between your basement floor and wall may prevent leakage. However, it will eventually fail in one of two ways:
#1. The water being blocked by the sealant will find another gap in your foundation to enter the home. Typically, this will be cracks in your foundation.
#2. The sealant you used will be forced off or penetrated by the water. Once this happens, all the water will leak through the opening in your sealant, rendering it useless.
Either of these events will happen due to the strength of the hydrostatic pressure. It’s not easy for water to push into your home. When it meets with resistance, such as a sealant, it will work its way through or around that resistance.
The Best Solutions to Protect Your Cove Joint
While sealing the gap isn’t recommended, you do have options to help protect your home from potential water damage. There are
multiple approaches to keep this water from leaking into your basement
How to Clean Up & Prevent Damage After a Flood in the Basement
By: | Published May 26, 2017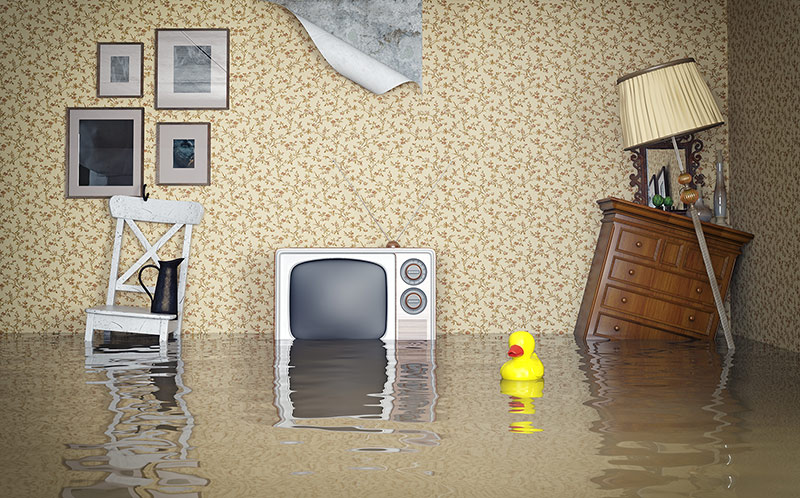
Even the most well-prepared homeowners sometimes can’t prevent environmental disasters from happening. Whether it’s a fierce storm or a burst pipe, flooded basements are a reality that affects hundreds of thousands of homes each year. What can you do to minimize the damage from a flood in the basement? Read our tips on the proper way to handle basement flooding, including recommendations on how to protect yourself before they happen.
Staying Safe:
The most important thing to remember is to never enter a basement that’s flooded if it could have electricity running. Chances are if your basement flooded, you either don’t have a sump pump, or you don’t have a sump pump with an emergency battery backup. If the power went out, you may want to get it restored right away to get your sump pump going again. But any electricity in the water creates a deadly hazard. Make sure to disable ALL of the power to the basement, a socket that’s not being used or loose wires you can’t see can still electrify the water.
Additionally, if your flood was due to backed up sewage, the average homeowner is not equipped to safely clean it up. You will need to contact a professional, as sewage can contain a large volume of contaminants that spread illness or disease.
Steps for Cleaning Up:
#1. Turn Off Water & Power.
If your basement flooding happened due to a leaky or burst pipe, the first step is to turn off the water. This will prevent any further water from filling the space and give you time to contact a plumber. It’s also critical to ensure the power is off for the entire basement. If you’re not completely confident that the water is safe, don’t attempt to enter the basement at all— call a professional.
#2. Remove Everything You Can
When you’re positive there’s no risk of electric shock, you can begin removing items that can be saved. Start by taking out any electronics, both for safety purposes and to potentially salvage them. You will have to remove furniture and anything stored in the area. Depending on the purity of the water, some of it may be reusable once it’s dried. A leaky pipe often just causes water damage, but backed up sewage or a groundwater flood will likely introduce bacteria into anything it touches, requiring you to throw it away or have it professionally cleaned.
#3. Clean Up Excess Water
Once your basement is safe and you have most of your salvageable items removed, you can start to tackle the water that’s remaining. There are a number of ways accomplish this, but they depend on the equipment you have available. The simplest solution is to use towels and buckets, soaking up and dumping the water elsewhere. A shop vac can also help, but make sure not to plug it in anywhere that could put you at risk for electric shock.
#4. Remove Moisture
After your basement has had all of the flooded water removed, you’ll need to dry out the area. Open the windows and use fans to help remove moisture from the environment. If you own a dehumidifier, make sure to turn it on with the windows closed and regularly empty it. Remember when using a dehumidifier to remove contaminated water that the dehumidifier itself will then also be contaminated and should be replaced after you’re finished.
If your basement is carpeted, you will need to remove the carpet. Even if you do everything to dry it out, moisture can stay trapped beneath it and lead to major mold problems. You probably won’t be able to save the carpet, especially if the flood came from an unclean water source.
You will also need to remove drywall and insulation. They can act as sponges for the water, and you’ll need to access the areas behind them to fully dry out the supports and make sure no wiring is still exposed to water. It’s highly recommended to leave these steps to a professional, to ensure the job is done thoroughly and without risking more damage to your home.
#5. Disinfect the Area
Once the basement is dry, you will have to disinfect everything. Even if the flood water was “clean,” moisture can quickly let bacteria and mold begin to thrive in your basement. Any surface that was wet or near the flood will need to be thoroughly disinfected. This may drastically reduce your chance for developing mold or other illnesses in the future.
Protect Yourself Against Water Damage
There’s a lot you can do to avoid water damage. Staying proactive will help reduce your risk of flooding, and save yourself countless hours and potentially hundreds of dollars in damage and expenses from a basement flood.
Keep Your Gutters Maintained
Your
gutters are your home’s first line of defense

