


Your gutter system is one of the most important parts of your home. Unfortunately, it’s one of the most common things that homeowners forget about until there’s a problem. Don’t let out of sight be out of mind – when your gutter isn’t functioning correctly, it could mean major damage! While waterproofing your basement is a good start, damaged gutters can affect your home’s siding and even the roof if not corrected in time.
Category: DIY
Protect Your Home from Common Spring Water Damage Causes with These Outdoor Maintenance Tips
By: | Published March 30, 2021
The start of spring is a happy time for all. Warmer weather, sunny days, and a return to enjoying the outdoors whether away or just relaxing on a deck! However, spring can sometimes bring a bit too much spring – which means heavy rains and potential flooding. Homeowners should be ready to protect their home against common spring water damage causes. We can help you identify the easiest solutions to get ahead of so you can focus on enjoying the nicer weather!
Avoid Downspout Drainage Disasters and Protect Your Home from Excessive Rain
By: | Published July 30, 2019
It’s raining, it’s pouring…and the average rainfall is soaring! According to Ohio’s Country Journal/Ohio Ag Net, the average rainfall across Ohio totaled 52 inches from June 1, 2018, to May, 31, 2019. That makes it the wettest yearlong period in Ohio since 1895! Not only does all that rain take its toll on the farming industry, but that means that well over 10 more inches of rain has fallen on rooftops across Ohio and Michigan this year than average. That excess rainfall can put a strain on downspout drainage systems everywhere. When your home’s downspout drainage system fails, damage to your foundation can result.
DIY Foundation Repair – Is It Right for You?
By: | Published May 29, 2018
Who doesn’t love the feeling of accomplishment? The pride, money savings and bragging rights at the completion of a successful DIY project are just a few of the reasons Americans just love to “do it themselves.” However, not every job around the house – or under it – is best tackled by a fix-it minded homeowner. Is DIY foundation repair right for you?
Just like there’s a difference between installing a new light fixture and rewiring an entire home, sealing a hairline crack and waterproofing the exterior of a home’s foundation are quite different tasks to undertake. Know your limits and trust your gut (or your spouse’s gut!) Don’t put your health or your property at risk.
Tips for Cleaning Mold Off Walls in Your Home
By: | Published August 4, 2017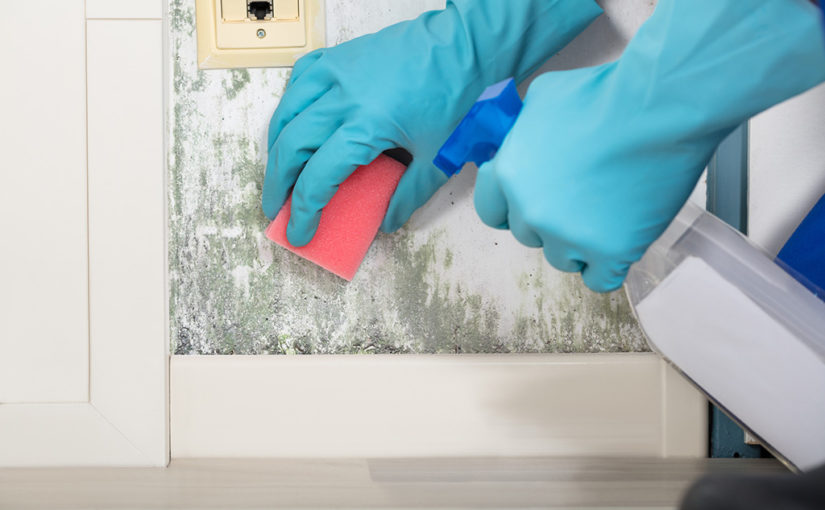
When you find mold, it’s more than just an eyesore. It’s a health risk for you and your family. Your first instinct may be to clean it, but it’s important to know the proper way to handle it. In addition to the potential dangers mold and its spores, improperly cleaning mold off walls in your home will likely allow it to come right back. Read our guide on cleaning mold off walls like concrete, brick and drywall to learn the safest solutions for removing these invasive growths.
Safety First
Before you tackle your mold problem, you’ll want to wear some protective gear to prevent illness. Not all mold is inherently dangerous, but identifying which type of mold you have is usually more difficult than simply looking at it. Inhaling mold spores can cause anything from simple allergic responses to severe sickness – for you or your pets.
Your mold-busting gear should include:
- Breathing mask
- Goggles or protective eyewear
- Waterproof gloves
All of these will help you prevent unnecessary contact with your mold. In addition to protective equipment, we recommend opening windows and improved ventilation as you will be working with chemical cleaners.
How to Clean Mold off Walls
Before you clean the mold off your walls, make sure you know what type of wall you’ll be cleaning. You don’t want to cause more damage, and how you clean drywall will be different than how you clean a concrete wall:
Cleaning Mold Off Concrete or Brick Walls
If mold appears on concrete or brick walls, it’s very simple to clean it off, though it might be an indicator of a crack in your foundation. You will need to use a cleaning agent that is antimicrobial, which you can purchase at almost any hardware store or even make yourself. Once you’ve put on your protective equipment, simply scrub the moldy surface with the cleaner until it’s completely wiped away. Some specialized cleaners will have additional instructions – if you’re purchasing a cleaner from the store, make sure to follow its directions closely.
One way to reduce your chances of dealing with moisture problems in your stone or brick basement is DuraShield. These panels create a barrier against moisture, insulating your basement walls and giving it a finished look with no maintenance required.
Cleaning Mold Off Painted Walls
Mold is common in rooms that have a lot of moisture – like your bathroom or basement. Ideally, these rooms should be painted with water-resistant “wash-and-wear” type paint that will prevent mold from growing deeper than the surface. It also makes it easier to clean when you do spot growing mold.
If you plan to use store-bought mold remover, make sure the formula is mild enough to minimize any damage to your paint. It’s possible, based on the severity of the mold, that you may have to repaint or even replace part of the wall. With the mold remover and a rag or towel, spray the affected area and scrub the mold. You may have to do this multiple times. Afterwards, spray water on the area and wipe it with a new towel or rag to clear the surface of any remaining mold remover.
Cleaning Mold Off Unsealed Drywall
Unfortunately, it’s not so easy to clean mold off unsealed drywall. Drywall is porous, which means the mold may be visible on the surface, but it’s also growing inside the pores. Without water-resistant paint, it’s very likely that by the time you notice the mold, it’s already inside the drywall too. You can look for mold by cutting inspections holes into the drywall. Remove the insulation and use a mirror to inspect the other side of the drywall.
If mold is growing on the insulation, it will need to be removed and replaced. Likewise, if you find that your drywall has mold beneath the surface, you will need to remove and replace it as well.
Unless you’re trained in mold remediation, the most you can do is temporarily reduce the overall mold growth by using a mold removing cleaner and scrubbing the visible mold away. You will need to contact your local mold experts for an inspection to discover the full scope of your mold damage. Even if you clean away all the mold, if it still has a source and some mold remains, it will continue to grow back.
Mold Encapsulation
Sometimes with porous surfaces, you will have trace amounts of mold that you can’t remove. If that’s the case, your only option may be mold encapsulation. To encapsulate mold, purchase a mold sealant and apply it to the mold after you’ve done everything to clean and scrub it away. This should be used as a last resort if the mold can’t be removed and the surface the mold is on cannot be replaced. If you think you need to do this, you should first contact a mold professional to make sure you don’t risk making the problem worse.
It’s often surfaces like brick or wood that will require encapsulation. Non-porous surfaces, or those that can be easily replaced like drywall should never need to be encapsulated.
DIY Mold Removal Cleaner
If you only see a small amount of mold and don’t want to purchase a mold remover, you can also create your own mold removal solution from common household products. The most common solution is simply a mixture of ¼ cup of bleach with 2 cups of warm water. Pour this combination into a spray bottle and it functions similarly to a store-bought cleaner.
Identifying the Source of the Mold
After you clean away any visible mold, it’s critical that you backtrack and find the source. Without correcting the cause of the mold, it’s guaranteed to come back.
The best way to fight mold is to prevent it
Black Mold Identification & Stopping It at the Source
By: | Published August 1, 2017
House molds are a growing concern in the minds of homeowners across the nation. Regardless of your area’s climate, leaks and cracks can promote mold growth in any nook or cranny of your home. Often, these growths go unnoticed for days, weeks or even months, allowing them to become health hazards and even damage your property. Certain molds are more dangerous than others; black mold identification in particular has become an important topic for property owners.
But how do you know which molds are dangerous and which are benign? It starts with knowing the properties of mold and understanding the symptoms they can cause. Read on and learn about house molds that could be affecting your family right now!
Stachybotrys Atra: Infamously Known as the “Black Mold”
Stachybotrys atra, or Stachybotyrs chartroom, is a specific type of toxic mold. This is what most people refer to when they say, “black mold.” While sometimes found in grain or soil, it’s much more frequently found in building materials that are rich in cellulose – often following water damage. High moisture content is a requirement for black mold to grow, so it is unlikely to be found in homes that are properly inspected and have been protected through waterproofing services.
This species of mold appears black or dark green, and has a unique shiny looking surface. Some would describe it as slimy-looking, but if it dries it often becomes gray and powder-like. The problem is when it comes to black mold identification, the only real way to confirm if it’s the dangerous, toxic species is with a microscope. Many different molds have similar appearance to Stachybotrys atra. Only with careful examination by an expert, practicing caution, can the species be accurately identified.
Low levels of Stachybotrys atra tend not to have any effect, though if you’re immuno-compromised it’s more likely to cause symptoms. Larger volumes of the mold lead to higher exposure, which can cause a variety of symptoms sometimes referred to as Toxic Mold Syndrome:
- Chronic coughing or sneezing
- Throat irritation
- Rashes
- Sinusitis
- Asthmatic Attacks
- Conjunctivitis
- Chronic Fatigue
- Persistent Headaches
These symptoms usually diminish or clear completely soon after removing the mold and its source.
Black mold affects animals too. While you may not notice a small spot of mold growing in that dark corner of your basement, you can be sure your pet will! Their curious nature may lead them to direct contact with the mold, causing illness or other reactions. If you have pets, keep an eye out for symptoms and take them to the vet immediately! Then,
contact a professional to inspect and locate the source of your mold problems.
How to Clean Up & Prevent Damage After a Flood in the Basement
By: | Published May 26, 2017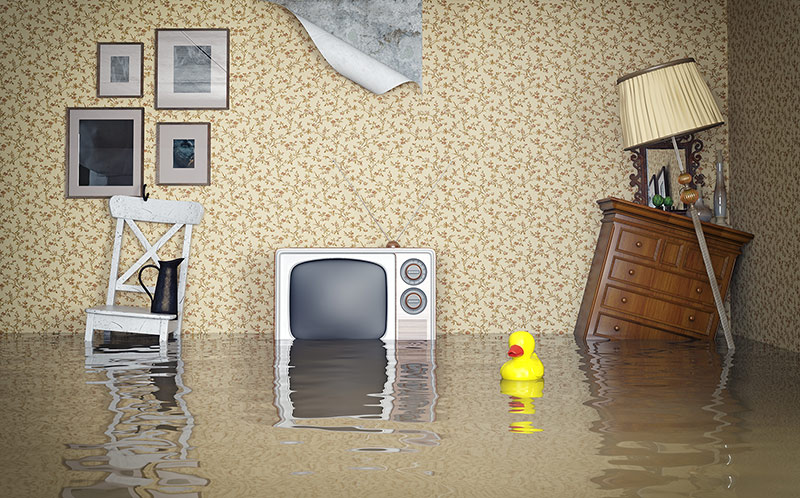
Even the most well-prepared homeowners sometimes can’t prevent environmental disasters from happening. Whether it’s a fierce storm or a burst pipe, flooded basements are a reality that affects hundreds of thousands of homes each year. What can you do to minimize the damage from a flood in the basement? Read our tips on the proper way to handle basement flooding, including recommendations on how to protect yourself before they happen.
Staying Safe:
The most important thing to remember is to never enter a basement that’s flooded if it could have electricity running. Chances are if your basement flooded, you either don’t have a sump pump, or you don’t have a sump pump with an emergency battery backup. If the power went out, you may want to get it restored right away to get your sump pump going again. But any electricity in the water creates a deadly hazard. Make sure to disable ALL of the power to the basement, a socket that’s not being used or loose wires you can’t see can still electrify the water.
Additionally, if your flood was due to backed up sewage, the average homeowner is not equipped to safely clean it up. You will need to contact a professional, as sewage can contain a large volume of contaminants that spread illness or disease.
Steps for Cleaning Up:
#1. Turn Off Water & Power.
If your basement flooding happened due to a leaky or burst pipe, the first step is to turn off the water. This will prevent any further water from filling the space and give you time to contact a plumber. It’s also critical to ensure the power is off for the entire basement. If you’re not completely confident that the water is safe, don’t attempt to enter the basement at all— call a professional.
#2. Remove Everything You Can
When you’re positive there’s no risk of electric shock, you can begin removing items that can be saved. Start by taking out any electronics, both for safety purposes and to potentially salvage them. You will have to remove furniture and anything stored in the area. Depending on the purity of the water, some of it may be reusable once it’s dried. A leaky pipe often just causes water damage, but backed up sewage or a groundwater flood will likely introduce bacteria into anything it touches, requiring you to throw it away or have it professionally cleaned.
#3. Clean Up Excess Water
Once your basement is safe and you have most of your salvageable items removed, you can start to tackle the water that’s remaining. There are a number of ways accomplish this, but they depend on the equipment you have available. The simplest solution is to use towels and buckets, soaking up and dumping the water elsewhere. A shop vac can also help, but make sure not to plug it in anywhere that could put you at risk for electric shock.
#4. Remove Moisture
After your basement has had all of the flooded water removed, you’ll need to dry out the area. Open the windows and use fans to help remove moisture from the environment. If you own a dehumidifier, make sure to turn it on with the windows closed and regularly empty it. Remember when using a dehumidifier to remove contaminated water that the dehumidifier itself will then also be contaminated and should be replaced after you’re finished.
If your basement is carpeted, you will need to remove the carpet. Even if you do everything to dry it out, moisture can stay trapped beneath it and lead to major mold problems. You probably won’t be able to save the carpet, especially if the flood came from an unclean water source.
You will also need to remove drywall and insulation. They can act as sponges for the water, and you’ll need to access the areas behind them to fully dry out the supports and make sure no wiring is still exposed to water. It’s highly recommended to leave these steps to a professional, to ensure the job is done thoroughly and without risking more damage to your home.
#5. Disinfect the Area
Once the basement is dry, you will have to disinfect everything. Even if the flood water was “clean,” moisture can quickly let bacteria and mold begin to thrive in your basement. Any surface that was wet or near the flood will need to be thoroughly disinfected. This may drastically reduce your chance for developing mold or other illnesses in the future.
Protect Yourself Against Water Damage
There’s a lot you can do to avoid water damage. Staying proactive will help reduce your risk of flooding, and save yourself countless hours and potentially hundreds of dollars in damage and expenses from a basement flood.
Keep Your Gutters Maintained
Your
gutters are your home’s first line of defense
DIY Basement Waterproofing: Tips and Things to Consider
By: | Published February 22, 2016
With networks like HGTV and the DIY Network, everyone is a self-proclaimed “Do-It-Yourselfer.” Depending on the size, scale and complexity of a project, the DIY approach can be a great solution. Not only can DIY projects save you money, but they also give homeowners a sense of pride and personal investment in their home. On the flip side, a DIY project gone bad can cause homeowners great devastation.
Here are some DIY basement waterproofing tips and things to consider before deciding if your basement is best handled as a DIY project or if you should leave this one to the professionals:
DIY Basement Waterproofing: Have You Done Your Research?
Once you’ve identified a method and have reviewed all of the steps that need to be completed for a successful basement waterproofing project, be sure to do a self-assessment. Do you have the skills, patience, and resources to complete this project? If so, happy waterproofing! If not, stop before you’re in too deep. There’s nothing worse than having to pay a contractor to come in to repair costly damages on top of completing the process for you.
Can You Complete this Project Safely?
Basement waterproofing can be a potentially dangerous process if the certain safety precautions aren’t taken. The project involves buried hydro and gas lines and excavation. Before getting started, it’s crucial that you know where the lines are located and safe excavation methods.
Can Your Body Handle the Work?
Basement waterproofing is a lot of work and requires some real physical strength and endurance. If you’ve kept your New Year’s Resolution to get stronger and are up to the task, be realistic about what you can handle; your health and safety depends on it! If not, there is no shame in calling in help.
What’s in Your Toolbox?
Specific tools are required for a successful basement waterproofing project. If you don’t have them already, consider if it’s worth the investment and if you can use the tools for future DIY projects.
Do You Need a Warranty?
If you have plans to sell your house in the near future, warranties on any repairs can be a win with potential buyers. Unless you’re willing to pack up your tools and head over to remedy any issues after you’ve handed over the keys, it could be beneficial to contract with a professional who can guarantee their work.
There are many factors to take into consideration when determining if your basement waterproofing project can be handled as a DIY project or if it’s best to leave it to the professionals. The reality is, there is only so much even the handiest of homeowners can do. When in doubt, it’s best to call the professionals.

Call Team EverDry Today!
For your next basement waterproofing project, contact us online to schedule an appointment or give us a call at (419) 841-6055. We also offer a
free 20-point inspection
Signs of Termites in Your Home? 5 DIY Tips to Preventing Infestation
By: | Published November 5, 2015
Pests in the home is a problem that every homeowner will inevitably face. Contrary to popular belief, pests are a problem during all seasons – even in the colder months! No matter how cold it is outside, pests can find a way into the home. Out of all the pests, termites are the most well known and have the ability to cause the most visible damage. Are there signs of termites in your home? You’ll most likely find termites in the basement or crawl space of your home.
Facebook
Signs of Termites in Your Home Basement
According to the National Pest Management Association, termites cause over $5 billion of property damage each year. There are three major classifications of termites based on their habitat:
- Dampwood
- Drywood
- Subterranean
In these environments, termites can create nests or mounds that are populated by one queen and up to thousands of male drones. These insects use tunnels or shelter tubes to collect food, bring it back to the nest, and protect themselves from predators. Termites can eat through plaster, plastic, foam, or asphalt to reach their food sources. The reason termites infest basements is because they need moisture to survive and will preferably choose damp wood over other food sources. There are a lot of ways to protect your home from these insects:
Tip #1 – Eliminate Their Food Source
Since wood is an attractive food source for termites, it should be kept away from the foundation. Wooden structures should not be in contact with the ground because it provides a direct pathway from the termite nest to food. All wooden structures should be at least six inches off of the ground, and all loose wooden debris should be picked up from around the outside of the house.
Tip #2 – Limit Mulch Use
A lot of homeowners use mulch to improve the aesthetic of their home, but the mulch also attracts termites. The wood in mulch has little to no nutritional value to the termites, but the moisture is what attracts these insects. Removing excess mulch can help you get rid of them.
Tip #3 – Reduce Humidity
Humidity creates moisture that the termites can use for survival. Crawl spaces in the basement become humid because of their size and lack of ventilation. You need to ensure that crawl spaces and other structures are well-ventilated to keep the humidity as low as possible. You also might want to consider getting a dehumidifier to help keep your basement dry. (Check out the E-Z Breathe Ventilator from EverDry Toledo!)
Tip #4 – Stop Moisture Build Up
The high moisture content of soil can make a structure more susceptible to termite attacks. There are several ways you can decrease moisture build-up:
- First, fix any leaky pipes that could be contributing to the soil moisture.
- Second, double-check to make sure that all drain pipes are unclogged.
- Third, grade the landscape around your house so that water can flow away from the building’s foundation.
Tip #5 – Create a Barrier
The natural water content of the soil evaporates and creates moisture in a building’s wooden structures. An excellent way to combat this is to lay down vapor barriers on top of the ground. These barriers keep the moisture restricted to the soil, increasing the chance for it to run downstream and away from building structures.

Get Your Basement Waterproofed Today!
One of the most important things that you can do to keep your basement dry and prevent termite infestation is waterproofing the basement. Effective waterproofing involves fixing any cracks that can let water inside the basement, installing the proper drainage system to take water away from the foundation, and using a sealant on the inside walls. Don’t let termites ruin your day! Schedule an appointment with Team EverDry today or give us a call at (419) 841-6055 to get started.
Stay connected with EverDry Toledo on Social Media!
Basement Nightmares: Dark, Dank, & Moldy
By: | Published October 30, 2015
“I’ll see you tomorrow morning,” Sarah’s mother shouted from the driveway. This is the first time Sarah was invited to a slumber party and not just any slumber party, but one hosted by, Jennifer, the most popular girl in sixth grade. Sarah desperately wanted to fit in, after all, she was turning twelve next month. I’m practically an adult, she thought to herself.
Jennifer greets Sarah at the door and leads her down the stairs to the semi-finished basement of her two-story home. Four other girls in her class wait on an area rug tucked away in the corner. The basement was dark, dank, and kind of creepy.
As night descended upon them, the slumber party went from makeovers and chick flicks to something more adventurous. “Ever play Moldy Mary?” Jennifer asks Sarah with a devilish glint in her eyes. Sarah never played, in fact, she never even heard of the game.
Jennifer turns off all the lights in the basement with only a flashlight illuminating her face. She goes on to explain that about a year ago, a neighbor named Mary was left home alone, her husband was out-of-town, and her children were at a neighbor’s house for a sleepover – much like this one. No one knows exactly what happened, but Mary was found in a flooded basement surrounded by spiders. It was later reported that she suffered from shock and an undisclosed illness due to prolonged exposure to Black Mold.
Jennifer tells Sarah that she gets to play the game first. All the girls giggle with anticipation. Jennifer instructs Sarah to go into the small, pitch black bathroom on the opposite side of the basement. Once in the bathroom, she’s to chant “Moldy Mary” three times and wait to see what happens.
Sarah reluctantly makes her way to the bathroom and shuts the door behind her. The room is pitch black, and she can’t even find the mirror. Something doesn’t feel right to her, but she wants to impress Jennifer. Sarah feels along the wall until she finds a hard, cold surface – the mirror. She takes a deep breath and shouts three times:
Moldy Mary! Moldy Mary! Moldy Mary!
Suddenly, to Sarah’s horror, a woman appears in the mirror dripping wet. Her runny nose, skin rashes and obvious disorientation are so shocking, that Sarah flees from the bathroom, up the stairs, and out the front door!
What is Back Mold?
Sarah’s story is only fiction, but the effects that black mold has on the body are very real. Stachybotrys chartarum, or black mold, is a microscopic organism containing enzymes and spores that are in charge of digesting and decomposing organic materials, as well as, reproduction. Black mold is extremely toxic and causes serious symptoms and health issues. These symptoms include mental impairment, breathing problems, internal organ damage, and sometimes even death!
Mold needs to consume something to survive, and it’s perfectly happy eating your house if you let it. Some molds are found in the paper backing on drywall, insulation, and wallpaper. Others places you find mold include air-conditioning units, under carpeting, underneath kitchen and bathroom sinks, and around leaky windows. If left unchecked, mold eventually destroys any and every part of your home that it touches. (Check out our article: 5 Tips to Preventing Black Mold)
Dark, Dank & Moldy Basements
Believe it or not, your basement can be one of the most dangerous places in the home if not properly maintained. It’s not uncommon to find hundreds or even thousands of mold spores per cubic foot of indoor air. These spores are extremely small and can survive in even the harshest of environmental conditions. Black mold can live anywhere provided moisture and oxygen are present. (Is Mold Dangerous for Pets? Find out!)
Finished concrete basements that haven’t been thoroughly waterproofed are extremely problematic. When moisture migrates from the ground to non-waterproofed basement walls, mold can start to grow almost immediately. Foundation leaks, high interior humidity, overflowing washing machines, and sewage back-ups are common sources of moisture.
Mold loves damp, dark places, which is why your basement needs to be checked for
water seepage

